|
WELCOME TO ADOBE PHOTOSHOP Adjustment Layers- Color retouching to one specific area. by Sal Calabrese
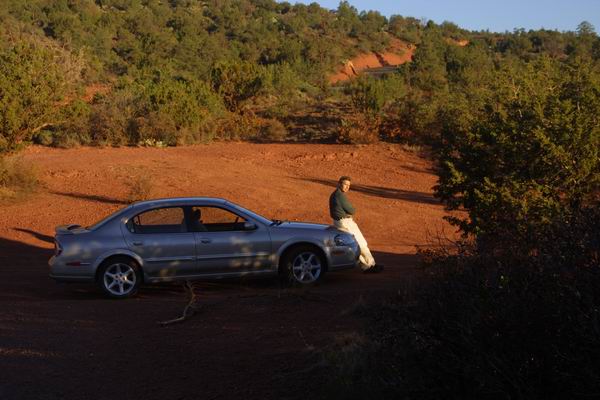
In this Article we will adjust one color in the photograph to make a better Photo. The Photo below will be Adjusted to improve the green in the Trees.
Original Image 1. Open Image that need adjustment. 2. Go to Layers Palette. From the create new adjustment or fill layer pop up menu ( at the bottom of the palette a black and white circle, fourth from left.) Choose color balance.
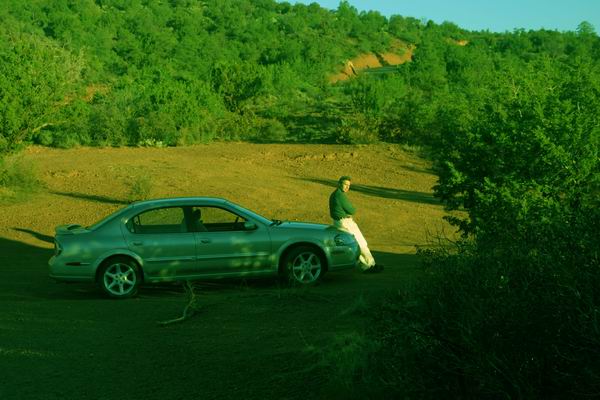
ALL Green Image 3. The color balance dialog box will appear. Drag slider to increase the desired color. The change will be applied to the whole image. Concentrate on the part of the image you want to change. When it is the color you want click OK. 4. Press the d key to change the foreground color to black. Get a paintbrush tool from the tool palette. A large soft brush. You can change the brushes size by using the navigation bar at the top of the screen. 5. Painting on your photo with black will remove the color you just added. Remove the color from the area of the photo that you do not want to change. If you erase to much of the color you can paint with white to bring the color back. To switch the foreground color to white type X.
Final Image 6. If you change your foreground color to gray it will paint a 50/50 of the original color and the color you added. SAL
|